")
Professional Exterior Painting Process Step by Step
The exterior painting process is a methodical and detailed program. These steps are designed with productivity & efficiency for our crews in order to produce the best results for a durable and lasting finish for our clients.
Step 1: Pressure Washing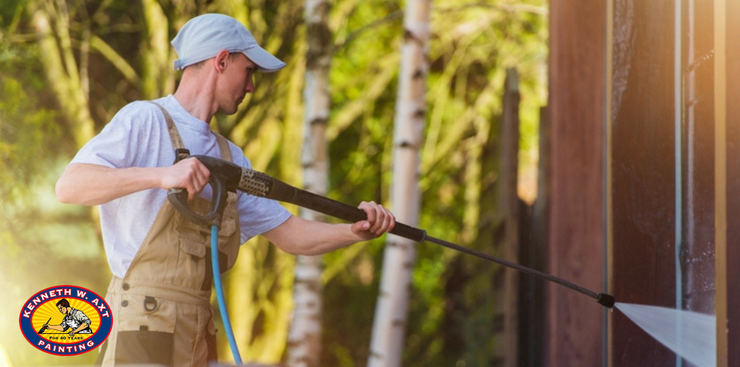
The exterior painting process begins with pressure washing. Pressure washing your home’s exterior can maintain and extend the life of your finish or prepare your home for repainting. By removing debris, mold, mildew and chalkiness the surface is more receptive to the application of new paint.
Prepare the Area: Removal of Decorative Items
Starting in the front of the house we remove items that are mobile, temporarily attached to the home or may hinder the process of effectively washing the home’s exterior.
Wreaths hanging on the front door should be removed and stored inside the house or the garage until the project is finished.
Planters of flowers and plants should moved off the porch and steps to a pine isle away from the house. A pine isle is best so that you don’t kill the grass over a period of days.

Flags should be carefully rolled and respected and placed inside the garage. They should be stood up in a corner rather than laying them on the floor.
It’s best to remove porcelain figurines, doormats, etc. from around the sidewalk, front porch and planting areas so that they are protected from pressure washing hoses and eventually ladders.
Check the right and left sides of the house for similar items.
In the back of the house there may be deck furniture that will need to be removed from the deck and again placed in a pine isle. It is best to cover the grouping of furniture with plastic to avoid sap and debris from falling on it.
Cover and protect awnings with plastic to prevent bleaching them.
It’s best to cover the barbecue grill with plastic and leave it in place. Thermometers and rain gauges etc. should be removed and placed in the garage or another safe area.
Screen porches should have all of the furniture pushed to the center and covered with plastic. In addition you may want to cover all the exterior screening with plastic to avoid any bleach or chemical getting on the screens and or the furniture.
Check under the decks for anything that should be removed or covered.
Protecting Doors & Windows
Remove the shutters from the house if they are mounted on Georgia-Pacific siding or wood siding. Number them from left to right starting at the upper floor. Use a magic marker on the top edge of the shutter. Leave the nails in the shutters.
Remove all screens from the windows. They should be numbered with pencil at the top inside corners. Number them from left to right as you face the side of the home.
They should be designated “F” for front of the House. “L” for the left. “R” for right. “B” for back of the house. The numbering should begin on the top floor left side and numbered all the way down to the basement far right side.

The clips on the screens should be folded flat then lay the screens on plastic, wrap them, tape them shut and stand them against a tree in the pine isle . This process prevents them from getting mud splashed and having to clean them.
If the homeowner is not at home the screens can be removed by bending with a putty knife the upper right side clip calling the corner of the screen out and then with a putty knife raise the screen at the sill about 1/2 inch and used to put a knife to pops the clips up. Close the upper right clip so that you can slide the screen back in when finished painting by setting a ladder under the windowsill.
Check all the windows and doors to make sure they are closed tight. The doors should be taped around all four sides with blue tape to prevent water leaking in on the floors.
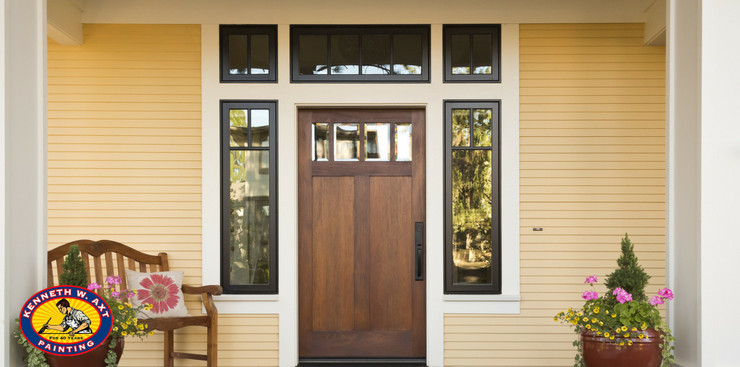
If there is a stained door it should be covered and taped thoroughly with plastic to prevent bleach streaks.
Electronics, Air Conditioning Units
If there are outdoor speakers, cameras, radios, or TVs these also will need to be covered or removed. If you are washing inside the screen porch and there is a fan it must be covered watertight to keep water out of the motor.
Do not cover the air-conditioners with drop cloths or plastic.
It is helpful to use plastic bags to cover some of the items that have been mentioned. Blue tape is a good tape to use as it will not pull paint off of the trim.
You are now ready for Pressure Washing to begin.

Method & Equipment
The primary purpose of pressure washing a house prior to painting is to kill the mildew through the application of common household bleach and water. A good method to wash a home’s exterior is to “soft wash”. Soft washing uses no heavy pressure on the surfaces of the home.
A 3500 psi pressure washer will save you time and increase efficiency. A 50 foot length of hose is best to use because longer hoses reduce the ratio of bleach to water and will not clean as effectively. Workers should use caution when employing bleach by wearing long sleeves to protect skin, protective eye wear and an appropriate mask to protect airways.
Soft washing prevents water from being forced through windows and doors like we see when using high pressure. It is all accomplished from the ground using extension poles.
Significant cobwebs and mud spots and perhaps even some heavily LG windowsills are cleaned by hand during the exterior painting process.
SEE PRESSURE WASHERS & EQUIPMENT
Ready to Begin Washing
You want to start your washing on the side of the house that is sunny. This gives that side more time to dry out before caulking and paint work begins.

The first floor and second floor of a home can be easily reached with an 8 foot extension wand and using the wide bleaching tip to apply the bleach and also to rinse.
Usually you will do one side at a time. Using the wide bleaching tip apply bleach starting at the top and bleaching down. When the side has been bleached you can then rinse with clear water. The bleach will kill the mildew almost immediately on making contact. Having finished the side with bleach you can immediately go back to the beginning point and start the rinsing process.
Before moving to the next side rinse all the flowers and shrubbery with clear water.
If there are wood shakes on the roof you must be careful not to get bleach on them they will turn color and become lighter. The same is true of decks.
It’s usually best to bleach the whole deck when the house is washed.
If there is a third floor there are special tips that will shoot 35 feet in the air and still carry bleach. This tip is used only on the third floor and above to apply the bleach and the same tip will be used to do the rinsing.
It is best not to use this bleaching tip to wash the second or first floors as it has much more pressure than the wide bleaching tip and may cause water to be forced through the windows.
If the foundation of the home has mud splash you can use medium pressure to remove the excess dirt.
DIY House Wash Recommendation: M1 House Wash
Step 2: Caulking Like in A Professional

The next step after Pressure Washing is to begin the prep work.
Use a high quality caulk where there are any openings or splits or missing caulk at windows, doors, corner boards, fascia boards joints, siding joints and columns, etc.
Cut the caulking tube at about a 45° angle and try not to leave any rough edges on the tip. Inside of the tip there is a seal that needs to be punctured for the caulk to come through. Puncture it several times so that it is not hard to pull the trigger.
Old caulk can remain if it is solid and functional. If there is a crack in the old caulk it can be caulked over with a thicker bead. If the old caulk is coming loose, use a razor knife to cut it out and remove it.
Successful caulking depends on how effectively you can apply the caulk into the crack. If it is a hairline crack the caulk will not penetrate into the joint it will only bridge it which makes it very susceptible to splitting.
Exterior caulking should be applied in 1/4 inch wide beads. An experienced painter will not have to run his fingers through the caulk except in a few places. Apply just enough that only a small amount needs to be removed with a finger.
Most exterior house caulk can be applied when the surface is still damp.